
Thinking of installing vinyl siding in Virginia? Read our guide first: Start by readying the home’s exterior, adding a durable weather barrier. Fix a starter strip next. Then, mount siding panels from bottom to top. Focus on windows and corners. Conclude with a thorough inspection for safety and uniformity.
Table of contents
What is Vinyl Siding?
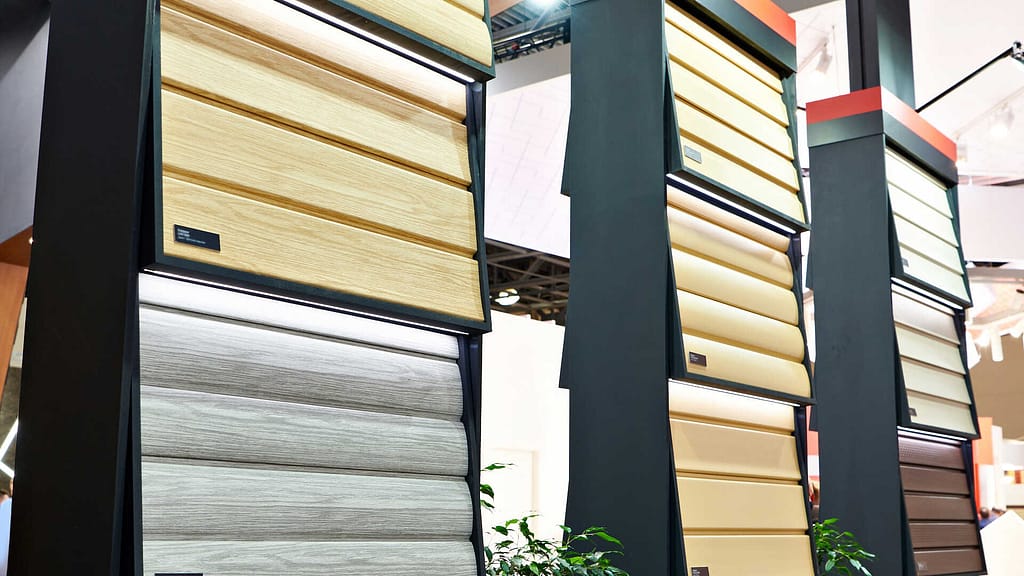
Vinyl siding is a type of exterior cladding made primarily from PVC (polyvinyl chloride) resins, combined with other elements to enhance its color, flexibility, and durability. It’s designed to mimic traditional wooden siding, among other textures, but comes with many advantages that wood and some other materials don’t offer.
Why Vinyl Siding is Popular in Virginia?
The combination of durability, aesthetics, cost benefits, and adaptability to Virginia’s specific climate challenges makes vinyl siding a popular choice among homeowners in the state. Vinyl siding is popular not just in Virginia but across many parts of the United States. Its popularity in Virginia can be attributed to several factors:
Weather Resistance
Virginia experiences both hot summers and cold winters. Vinyl siding is durable, and capable of resisting the expansion and contraction that comes with these temperature fluctuations, ensuring homes remain protected year-round. Virginia’s climate, especially in the coastal and eastern parts, can be humid. Vinyl siding doesn’t rot or suffer from moisture-related problems as wood might, making it a practical choice for this region.
Low Maintenance
Unlike wood that might rot, warp, or need regular painting, vinyl siding is virtually maintenance-free, resisting pests and moisture. This makes it a practical choice for homeowners looking to minimize upkeep efforts and costs. It doesn’t need to be painted, and periodic cleaning with mild soap and water is generally all that’s required to keep it looking new.
Energy Efficiency
Vinyl siding, especially the insulated kind, offers an added layer of protection against the elements. This can result in significant energy savings as homes remain cooler in summer and warmer in winter. This can be appealing in places with varying seasons, like Virginia, where homeowners are concerned about keeping heating and cooling costs down.
Aesthetic Flexibility
Vinyl siding comes in a vast array of colors, styles, and textures, enabling homeowners in Virginia to achieve the desired look for their homes, be it traditional, contemporary, or anything in between. While Virginia has a rich architectural history, many homes, especially in suburban and rural areas, are designed with a wood-style aesthetic. Vinyl siding can emulate the look of wood without the associated maintenance challenges.
Affordability
Vinyl siding is often more affordable than many other exterior cladding options, such as wood or brick. This makes it an attractive option for homeowners looking for an economical way to improve or maintain the exterior appearance of their homes.
Permits and Regulations in Virginia
In Virginia, when it comes to updating or replacing the siding of your home, certain actions require permits while others may not. Here’s what you need to know:
- Complete Replacement: Undertaking a comprehensive change to your home’s siding will likely necessitate obtaining a permit from your local building department. This step is crucial to ensure the work is up to par, particularly in withstanding Virginia’s diverse climatic challenges. Additionally, it’s vital that the space beneath the siding is adequately prepared to stave off moisture, preventing issues like mold and rot.
- Minor Repairs or Covering: If your plans involve minor repairs such as mending a broken plank or covering up an existing siding with a new layer, you might bypass the need for a permit. But as a general guideline, it’s always wise to consult your local building department.
- Cosmetic Changes: When considering painting or staining your siding, most homeowners won’t need a permit. However, if your residence is located in a historic district, is subject to HOA guidelines, or adheres to specific community standards, you may encounter restrictions on color choices. In such cases, obtaining permissions from the relevant local authorities or HOA boards becomes essential.
Additionally, for an in-depth understanding of permits and regulations in Virginia, it’s beneficial to explore the Virginia Uniform Statewide Building Code.
Necessary Tools and Materials
Having all the necessary tools and materials is vital when installing vinyl siding. Being prepared ensures a smoother, more efficient process, reduces the risk of interruptions, and guarantees a professional-looking finish. It’s a way to ensure the siding not only looks good but also stands the test of time.
- Vinyl Siding Panels: These are the main components that cover the exterior of a structure. They are available in different styles and colors to fit your preferences.
- Utility knife or tin snips: To remove old siding if present.
- Hammer or staple gun: To secure the weather-resistant barrier or house wrap.
- Ladder or Step Stool: Essential for reaching various heights when installing vinyl siding.
- Tape measure and chalk line: For marking guidelines to ensure consistent and level siding placement.
- Level: To make sure the starter strip is straight.
- Hammer or power drill: For nailing or screwing the starter strip in place.
- Siding nails or screws: To attach the vinyl panels.
- Vinyl siding hammer or a power drill: For nailing or screwing the siding panels.
- Weather-Resistant Barrier: A protective layer, often referred to as a house wrap, placed over the home’s exterior to prevent moisture from penetrating. It serves as an added defense against potential water intrusion behind the siding.
- Siding snap lock punch: Helps in snapping panels into place if needed.
- Tin snips or a utility knife: For cutting special trim pieces to size.
- J-channel or J-trim: Special trim used around windows and doors for a neat finish.
- Inside and outside corner posts: For neatly covering the ends of the siding panels at corners.
- Caulking gun and exterior caulk: To seal any gaps, particularly around windows and doors.
- Utility trim or finish trim: To secure the top row of siding.
Safety
Disclaimer: While this blog post provides guidelines on how to install vinyl siding, we strongly recommend working with a professional when undertaking such a project. Installing vinyl siding requires specialized knowledge, expertise, and experience to ensure proper installation and safety. If you decide to attempt this task, it is essential to receive appropriate training and use the necessary safety equipment to prevent injuries or mistakes. Incorrect installation can result in structural damage, reduced energy efficiency, or aesthetic flaws. Always prioritize safety and the long-term durability and appearance of your home by consulting with an expert before beginning any siding project.
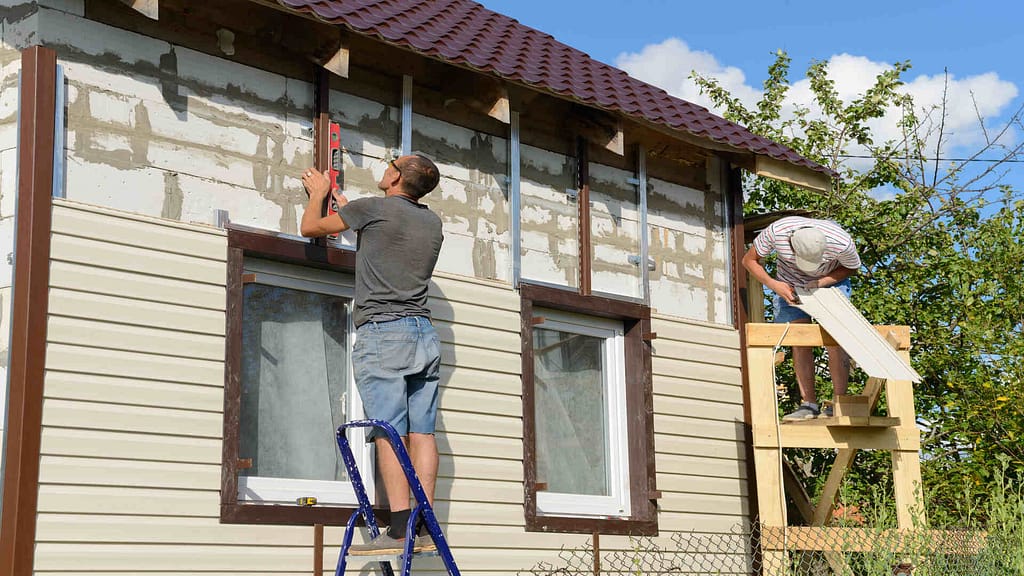
Vinyl Siding Installation Process
After gathering all the necessary tools and materials, embark on the vinyl siding installation process. This involves preparing the home’s exterior, ensuring secure and aesthetic placements around intricate areas like windows and doors, and concluding with thorough inspections to guarantee a snug fit and proper protection. Bringing a friend to help you can make the whole job easier.
Preparing the Surface
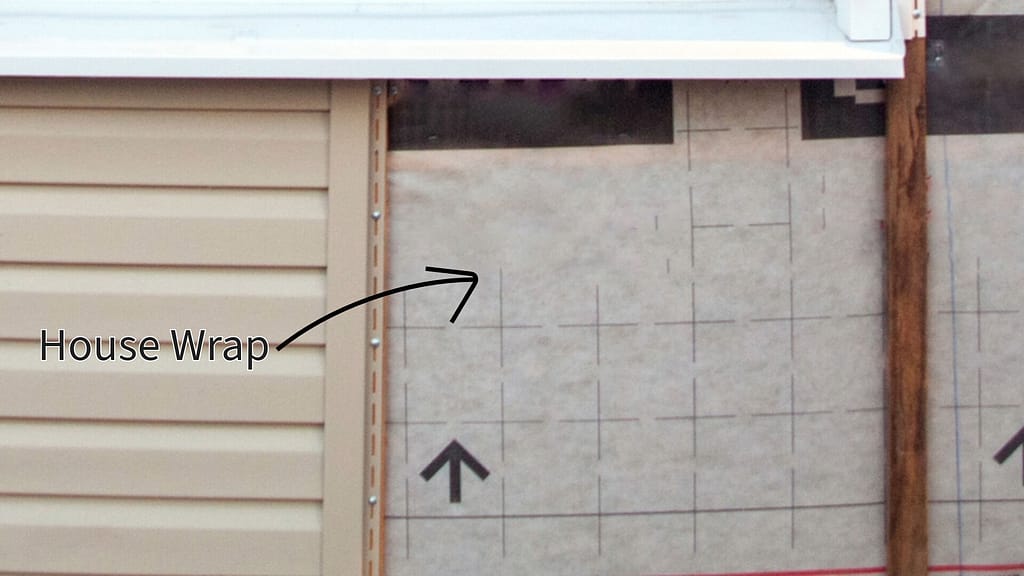
Before any siding can be affixed, it’s essential to prepare the exterior surface of the house. Remove any old siding, ensuring the surface is smooth and free from protrusions. Install a weather-resistant barrier or house wrap, which will act as a moisture barrier and enhance energy efficiency. This barrier is typically secured using tacks or staples. Mark guidelines to ensure that the siding panels will be level and consistently spaced as they go up.
Installing the Starter Strip
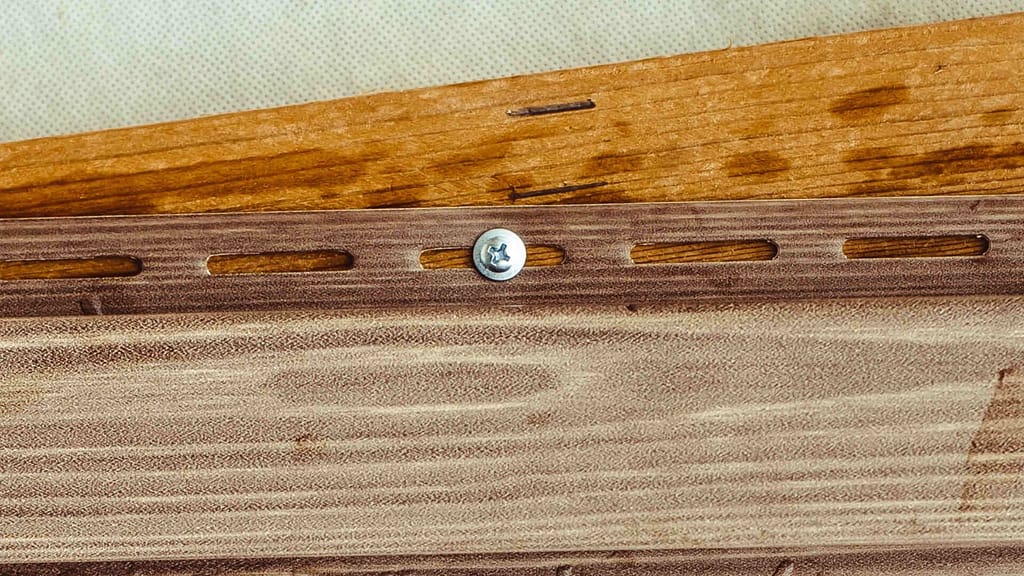
Put the starter strip at the bottom of the outside wall. This is where the first piece of siding goes. Make sure it’s straight. Then, attach it with nails or screws, but not too tight. This lets the siding move a little when it gets hot or cold.
Applying the Siding Panels
Start at the bottom and put the first piece of siding onto the starter strip. Attach each piece with nails or screws, but don’t make them too tight. This lets the siding move a bit. The pieces should overlap each other, so everything looks smooth and keeps water out. Keep going up until you reach the top, making sure each piece is straight.
Addressing Windows, Doors, and Corners
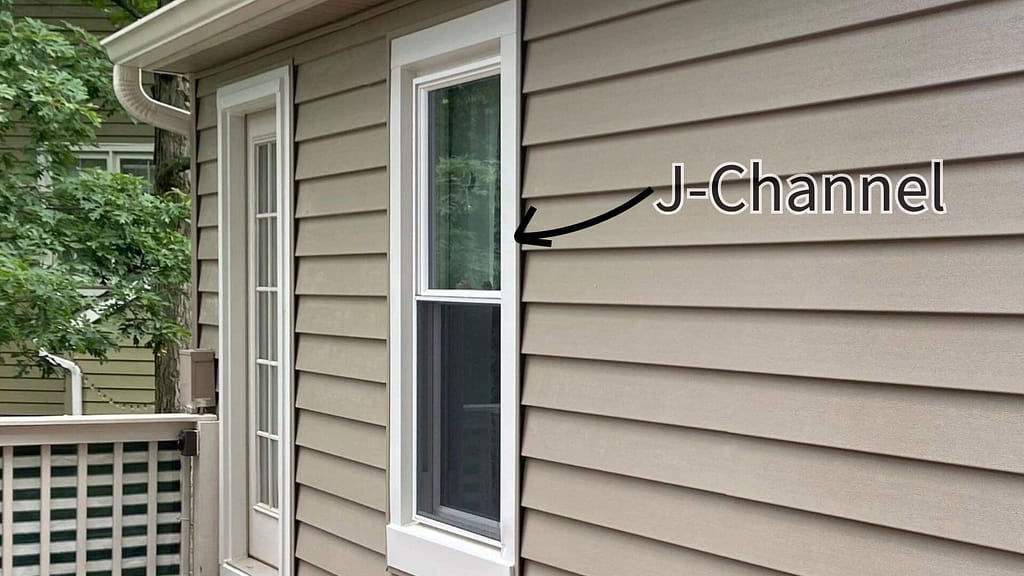
For windows and doors, use special trim pieces, like the J-channel, to make them look neat and keep water out. For the corners of the house, use special corner pieces. These make the siding look complete and help protect against bad weather.
Final Touches
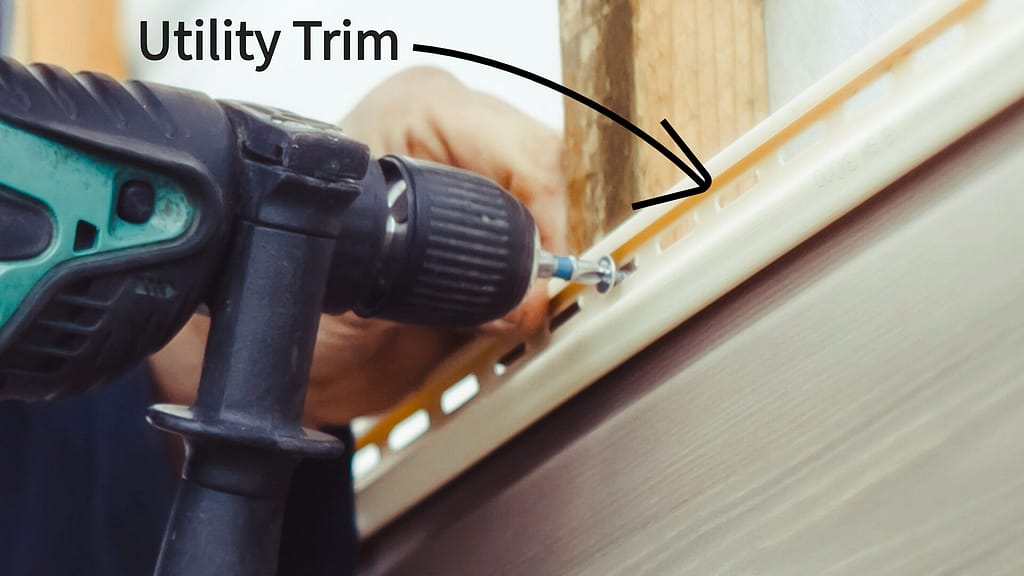
Once all panels and trims are in place, inspect the entire installation to ensure consistency and security. If there are gaps around windows and doors, use a caulking gun to seal them. Utility trim or finish trim might be used to secure the top row of siding, especially under eaves or overhangs.
After installing your new vinyl siding, you may wish to maintain its pristine and clean condition. You may want to check our Vinyl Siding Maintenance and Care guide for helpful tips.
Conclusion
Virginia stands as a testament to the adaptability and appeal of vinyl siding, with its unique blend of aesthetic flexibility, durability, and energy efficiency making it a popular choice among homeowners. While this guide provides a comprehensive DIY approach to vinyl siding installation, emphasizing the crucial steps and the significance of having the right tools, it’s essential to note that many Virginians choose the expertise of professional siding contractors.
Opting for seasoned professionals ensures precision, and adherence to local regulations, and can provide homeowners with added peace of mind about the longevity and quality of the installation. In any endeavor, being informed is key, whether one chooses the DIY route or seeks out the expertise of trusted professionals.
Fact checked by Jacob Petrosky – 9/19/23