
To measure windows in Maryland, start with width across jambs, then height from sill to top, and depth from the front sill to trim. Always check diagonal corners for squareness. Precision in dimensions ensures the perfect fit for every installation.
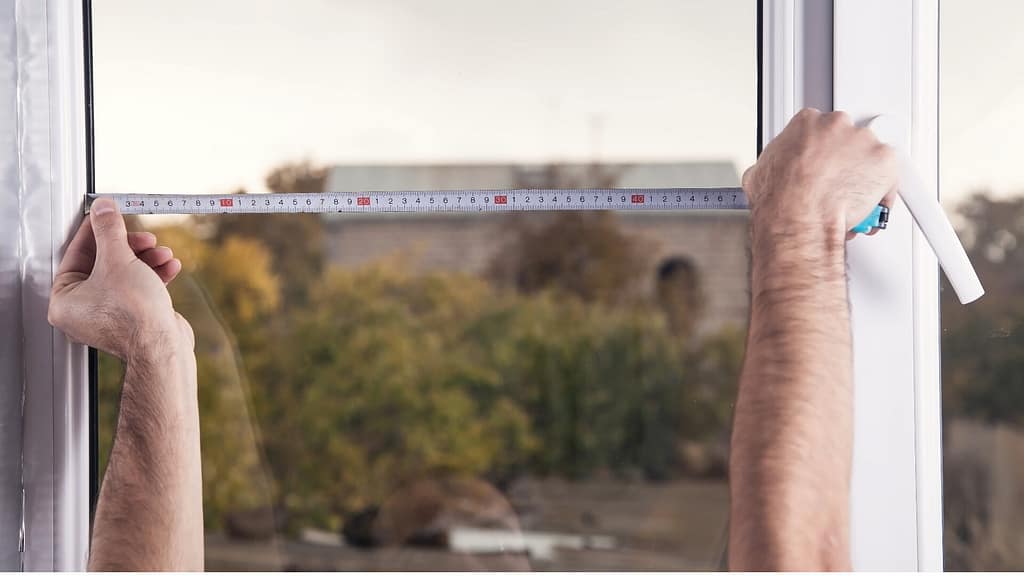
Table of contents
Why Measuring Windows Accurately Matters in Maryland
In Maryland, accurately measuring windows is more than just about fit—it’s about energy efficiency, safety, aesthetics, and cost. The state’s diverse climate demands well-measured windows to reduce drafts, ensuring a comfortable home and lower energy bills. Moreover, precise measurements are crucial for emergency egress windows in vital spaces like bedrooms, where an incorrect size can be a safety risk.
Energy Efficiency
Maryland experiences varied seasons, from sweltering summers to biting winters. An accurately measured window ensures a snug seal, preventing drafts and keeping homes comfortably insulated. This translates to energy efficiency, as a well-sealed home reduces the strain on heating and cooling systems, leading to potential savings on energy bills.
Safety Concerns
Measuring egress windows right is very important, especially in bedrooms. If a window is too small, it can make it hard to get out quickly during emergencies. According to the International Residential Code (IRC), the window sill can’t be more than 44 inches (1118mm) from the floor. This rule helps make sure everyone stays safe. If you’re in doubt about replacing your windows contact the window replacement specialists in Maryland- American Home Contractors for a free quote today.
Aesthetic and Resale Value
Maryland’s homes are often celebrated for their charm and elegance. Windows that fit perfectly complement the architecture and enhance the overall beauty of the house. Conversely, ill-fitting windows can detract from a home’s visual appeal.
Avoiding Additional Costs
Mistakes in window measurements can be expensive. Incorrectly sized windows might necessitate costly adjustments or replacements. This could mean purchasing new windows or modifying existing frames, both of which incur additional costs.
Tools You’ll Need for Accurate Measurements
Utilizing the right tools for window measurement is crucial. They ensure precision, enable access to all parts of the window, and facilitate immediate recording of dimensions.
Tape Measure
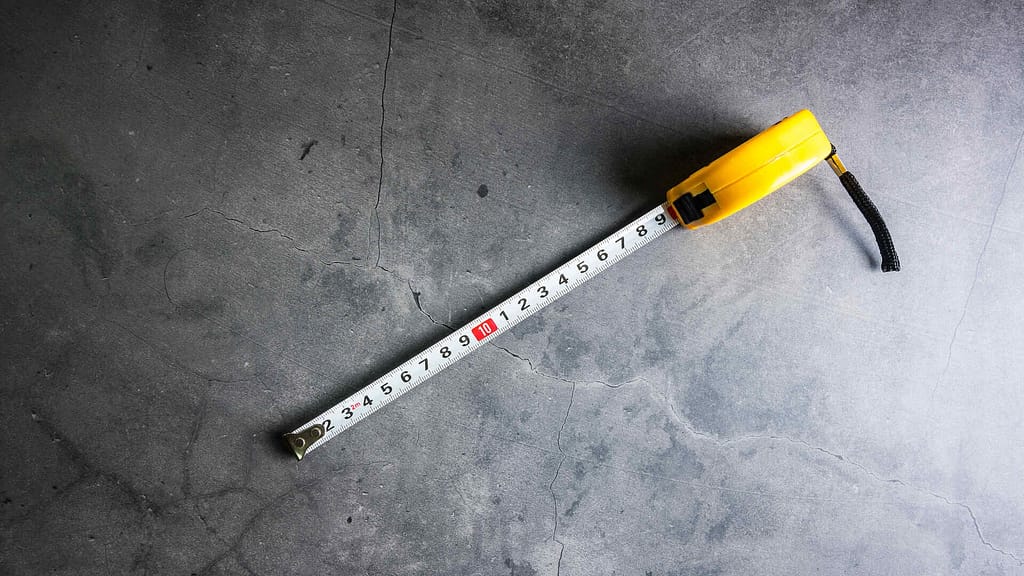
The tape measure is an indispensable tool when it comes to accurately sizing up windows. Designed with a retractable, flexible metal strip marked with linear measurement, it allows for precision in capturing both horizontal and vertical dimensions of window openings.
Ladder or Step Stool (for high windows)

Accurately measuring high windows requires not only the right tools but also the right positioning. Step stools and ladders provide the elevation needed to make the task both safe and precise.
Notepad and Pencil

Once you’ve taken measurements, it’s crucial to promptly record them on a notepad to prevent any mix-ups or forgotten dimensions. Using a pencil offers the flexibility to easily correct mistakes, ensuring the measurements you note down are both organized and precise.
Measuring the Window
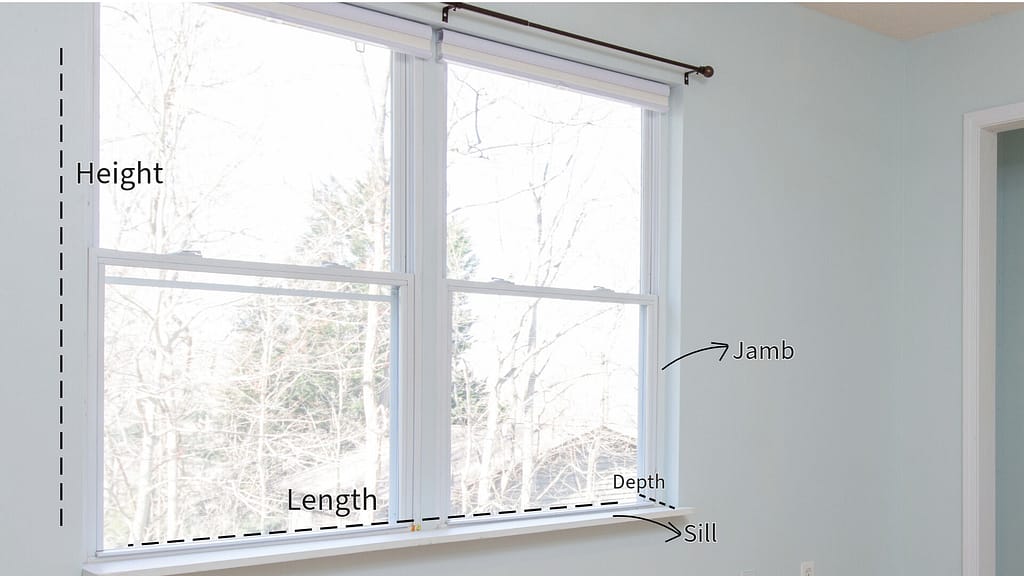
Accurately measuring a window is crucial to ensure the ideal fit when considering replacements. It’s important to capture the width, height, and depth of the window, while also checking its squareness to guarantee straight alignment. Inaccurate measurements can lead to imperfect fits, causing issues like drafts and visual inconsistencies.
Width Measurements
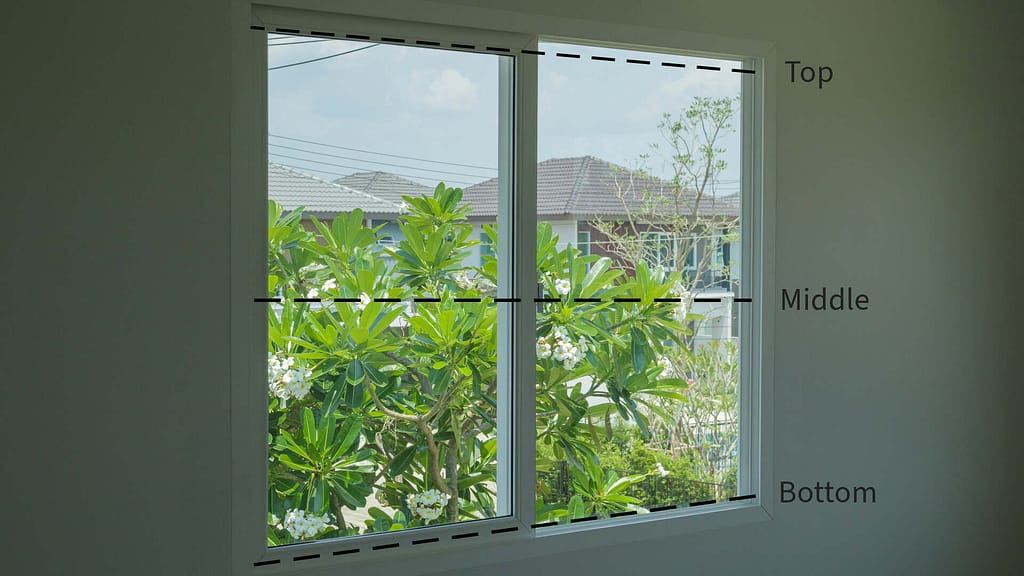
- Start by positioning your measuring tape horizontally across the window.
- Measure the distance between the jambs (the vertical sides of the window frame) at three points: the top, middle, and bottom of the window.
- Ensure you’re measuring from the surface of the jambs, avoiding outer moldings such as trim strips or parting beads.
- For the most precise fit, always use the smallest of the three width measurements when ordering your window.
Height Measurements
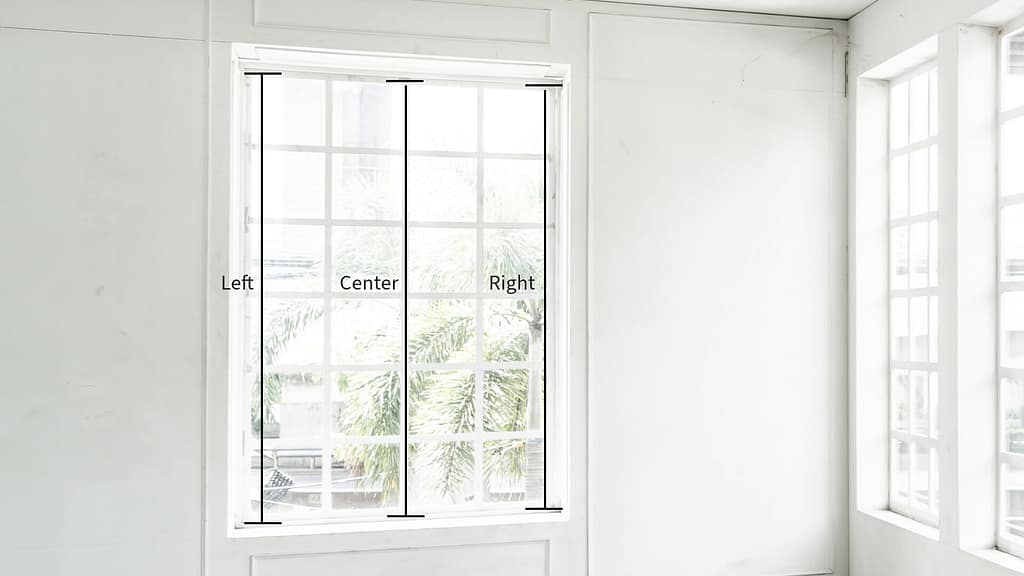
- Begin by positioning your measuring tape vertically.
- Using the surface closest to the inside of the window, measure the distance from the high point of the window sill (the bottom horizontal part) up to the top of the window opening.
- Take three measurements: one on the left side, one in the center, and one on the right side of the window.
- Always use the smallest of these three height measurements when placing an order for your window to guarantee the best fit.
Depth Measurements
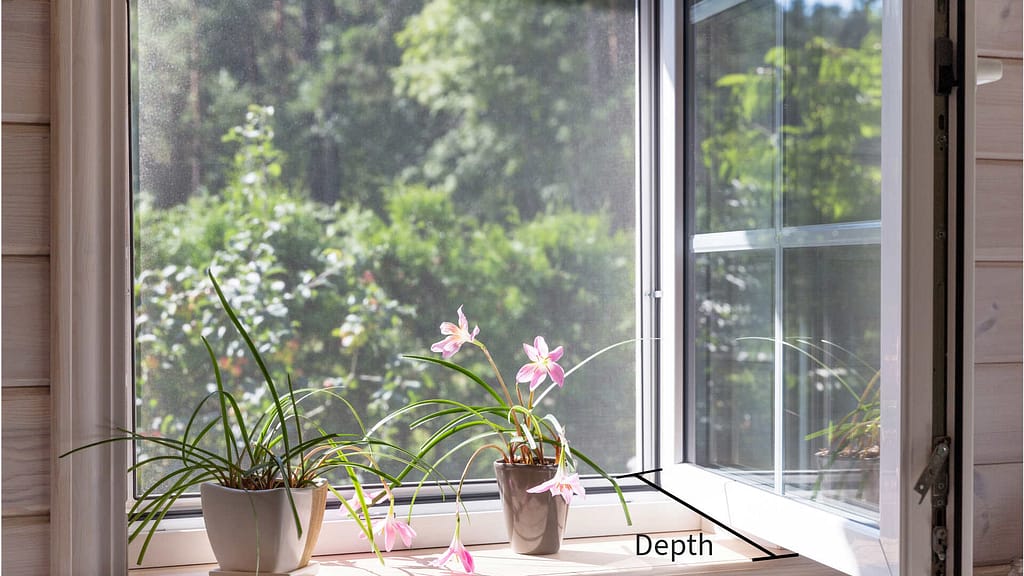
- Open the window completely, revealing the entire sill space.
- Using a measuring tape, calculate the distance from the front of the window sill to the back edge of the trim.
- Ideally, this measurement should be a minimum of three and one-fourth inches to comfortably fit a standard replacement window.
Squareness Measurements
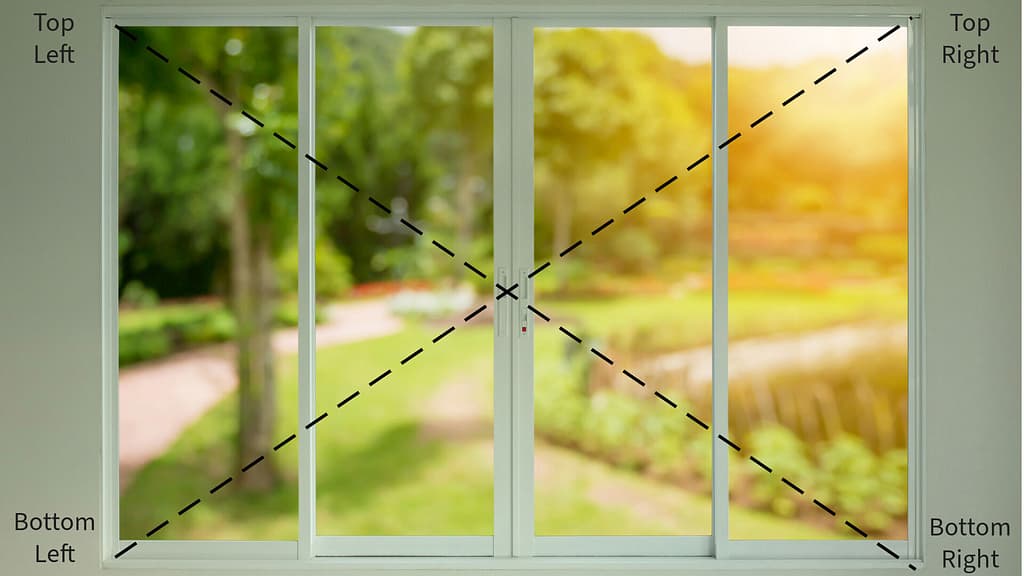
- Take a tape and measure from the top left corner to the bottom right corner of the window.
- Now measure from the top right corner to the bottom left corner.
- Both measurements should be close to the same. If they’re very different, the window isn’t straight.
- If the window isn’t straight, it may need some changes. This might mean adding small pieces to make it fit better or even putting it in again.
Tips
These additional tips should help ensure you get the most accurate measurements possible.
- Clean the Area: Ensure the window and surrounding space are clean and free from obstructions like curtains or blinds. This makes it easier to access and measure.
- Natural Light Helps: Measure during the daytime. Natural light can help you see details and ensure accuracy.
- Avoid Stretching the Tape: Pulling the tape measure too taut can cause a slight distortion in your measurement. Let it rest naturally.
- Label as You Go: If you’re measuring multiple windows, label each measurement (e.g., “Kitchen Window Width”) so you don’t get confused later.
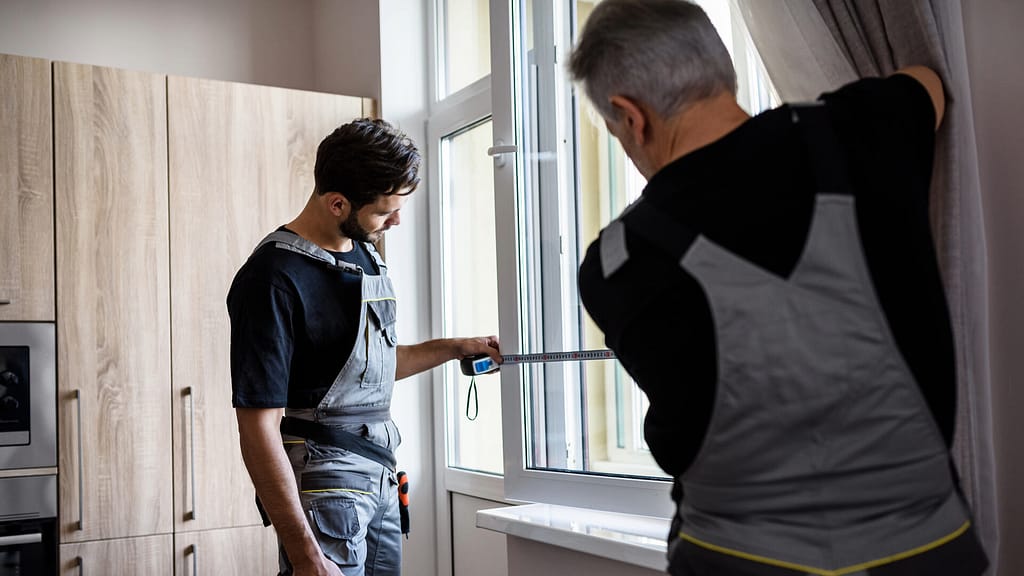
- Buddy System: Having someone help you measure your windows makes the job easier and more accurate than doing it by yourself.
Conclusion
Ensuring accurate window measurements is not just about aesthetics; it directly impacts the comfort, safety, energy efficiency, and cost-effectiveness of homes in Maryland. Armed with the right techniques, tools, and tips—including the invaluable buddy system—homeowners can confidently undertake the crucial process of window measurement. This diligence will guarantee not only a seamless fit but also the enduring charm and functionality of their homes. It’s an endeavor that, when executed correctly, yields benefits that resonate both immediately and in the long run.
This guide provides straightforward instructions for measuring windows. If you’re hesitant about doing it yourself, it might be helpful to consult a local window replacement specialists.
Fact checked by Adrian Catolico – 9/15/23